
Tile grinding sounds simple until the dust starts moving through the house, the grinder bites into the surface, or you realise the tile is harder than expected. If you’re working out how to grind tile, the real job is not just removing material – it is controlling damage, keeping the substrate sound, and leaving the area ready for what comes next.
That matters whether you’re fixing a lip between tiles, smoothing a stubborn high spot, removing leftover adhesive, or preparing a floor after tile removal. Done properly, grinding can save time and avoid a bigger strip-out. Done poorly, it can crack surrounding tiles, scar the slab, and create a cleanup issue that takes longer than the grinding itself.
When tile grinding is the right approach
Grinding is usually the right method when you need to remove a small amount of material with control. That might mean easing down a sharp tile edge, flattening a proud corner, taking off thin-set residue, or smoothing a concrete slab after tiles have been lifted. It is a precision job, not a demolition method.
If the tile is loose, drummy, badly cracked, or the whole floor is failing, grinding is often the wrong fix. In those cases, removal is usually faster and cleaner in the long run. The same applies when the issue sits below the tile, such as movement in the substrate or poor bedding. Grinding the top will not solve a structural problem underneath.
Know what material you are dealing with
Before you put a grinder anywhere near the floor or wall, identify the tile. Ceramic is generally easier to grind than porcelain. Porcelain is denser, harder, and less forgiving. Natural stone like marble, slate, or travertine behaves differently again and can mark, chip, or polish unevenly depending on the tool and pad used.
Glazed tiles need particular care. Once you grind through the surface glaze, the exposed area will usually look different from the rest of the tile. That can be acceptable on a hidden edge, but not in the middle of a finished floor. If appearance matters, you need to think beyond removal and consider the final finish.
The tools that actually matter
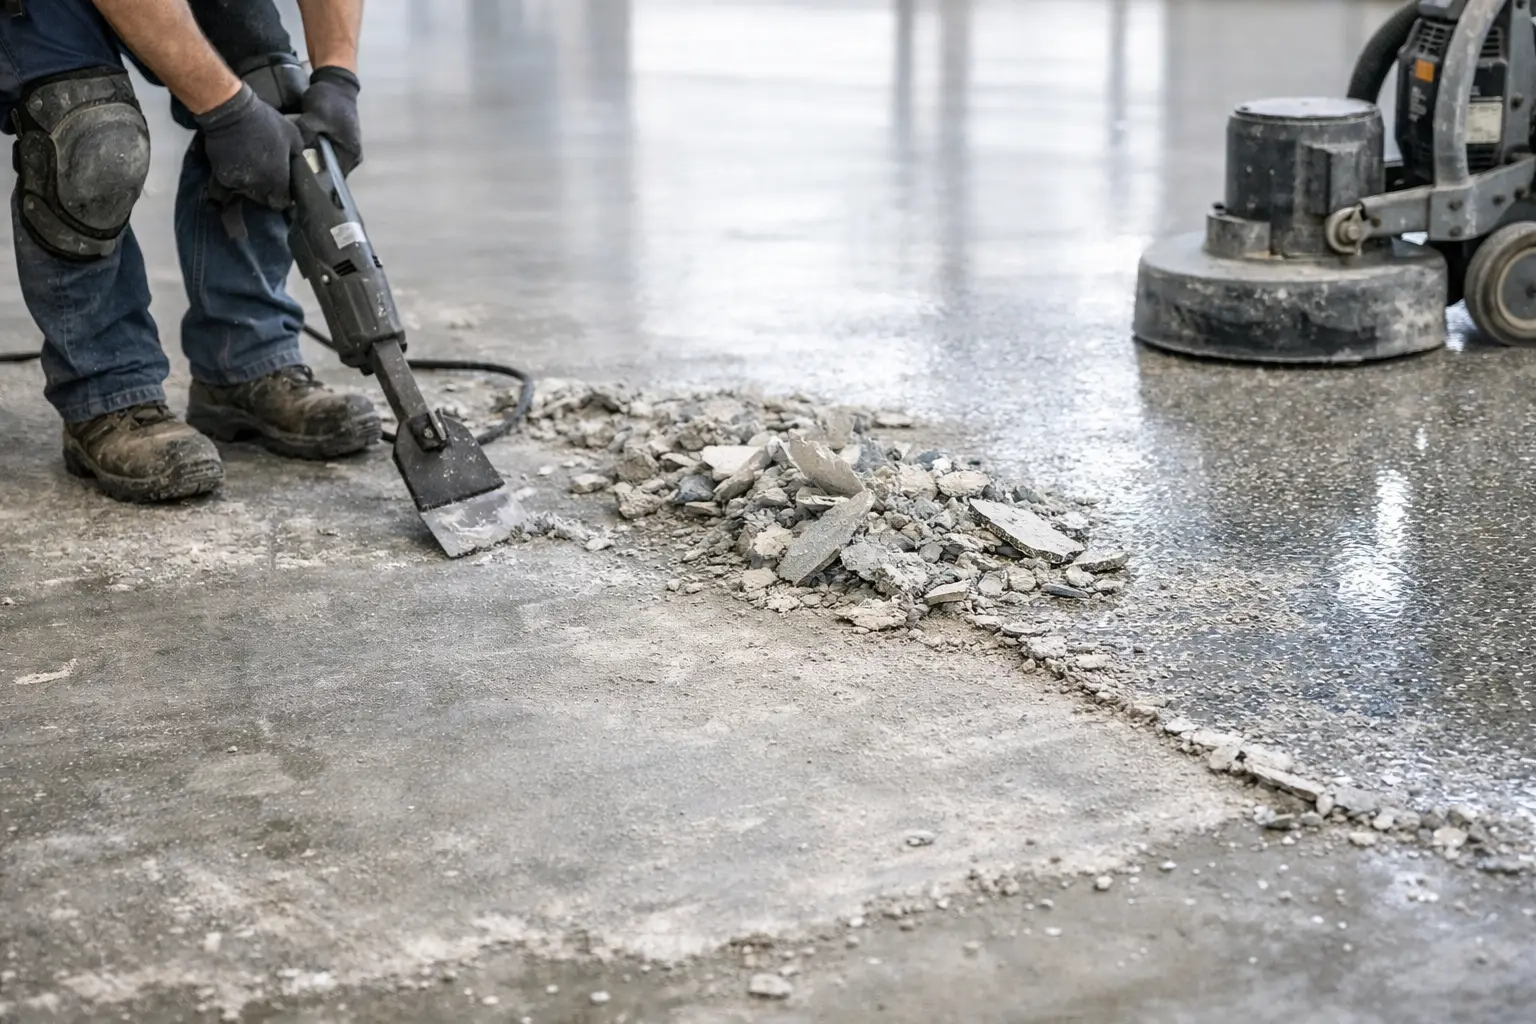
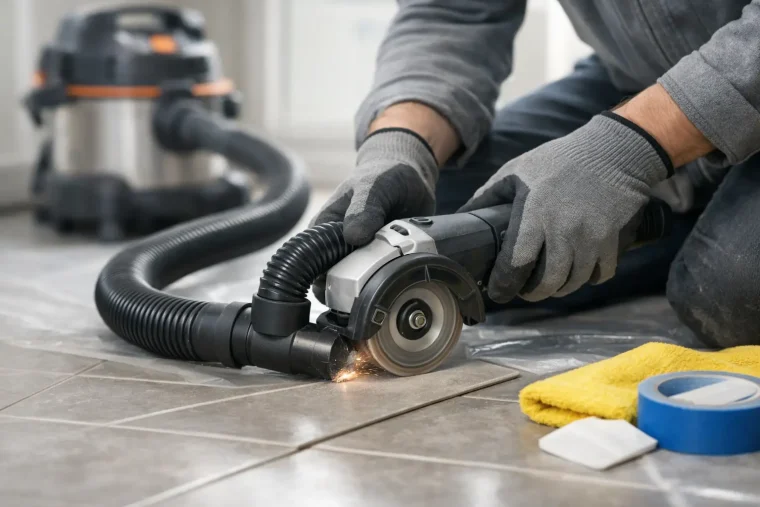
If you want to know how to grind tile properly, start with the right equipment. The core tool is usually an angle grinder fitted with a diamond cup wheel or diamond grinding disc suited to the material. For finer edge work, diamond hand pads can help control the finish.
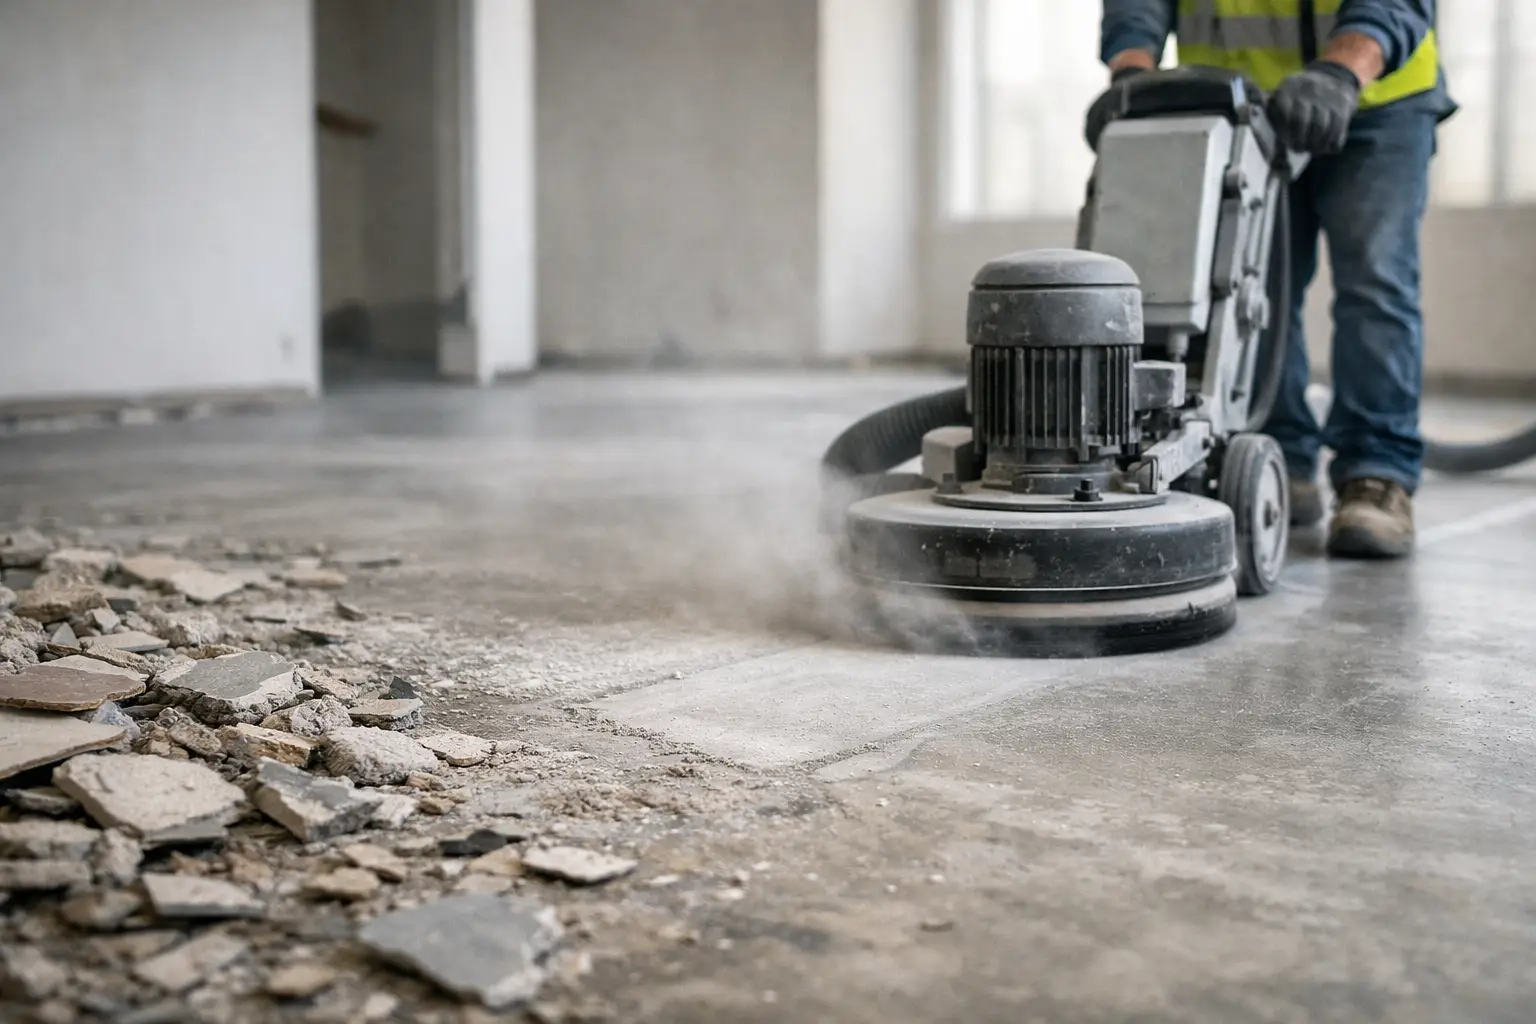
Dust control is not optional. A grinder shroud connected to a suitable vacuum makes a major difference. Without extraction, fine silica dust spreads fast and creates a safety risk as well as a cleanup problem. On an occupied site, that can become the biggest issue on the job.
You also need proper PPE – respirator, eye protection, hearing protection, gloves, and appropriate footwear. Tile grinding is loud, abrasive work. The tool can kick, chips can fly, and dust can stay airborne longer than people expect.
How to grind tile step by step
Start by clearing the area completely. Remove furniture, cover nearby surfaces, and isolate the work zone as much as possible. If you’re inside a lived-in home or a commercial space still in use, take the time to protect adjacent rooms. Dust has a way of travelling well past the immediate job area.
Check the tile and mark the exact section to be ground. That sounds basic, but it prevents overworking the surface. If you are reducing a lippage point between two tiles, mark the high tile only. If you’re removing adhesive or bedding residue, define the edges of the patch so you can keep the floor level.
Set up the grinder with the correct diamond attachment and connect dust extraction before you begin. Test the tool on a less visible section if possible. Different tiles respond differently, and you want to know how aggressively the disc cuts before you commit to the visible area.
Use light, controlled passes. Do not force the grinder. Let the diamond do the work. Pushing too hard builds heat, increases chipping, and makes the grinder harder to control. Keep the tool moving and avoid sitting in one spot unless you want to gouge the tile or slab.
Work in short stages and check your progress often. Grinding is one of those jobs where a few extra seconds can take off more material than you meant to remove. If you’re chasing a flush transition, stop regularly and check with a straight edge.
Once the high point or residue is reduced, refine the area if needed. On some materials, a coarser grind leaves visible scratch marks, so you may need a finer pass or hand finishing. Then vacuum thoroughly and inspect the surface from different angles. What looks flat under dust can show obvious marks once clean.
Common problems when grinding tile
The most common mistake is treating tile grinding like concrete grinding. They overlap, but they are not the same. Tile surfaces can chip at the edges, glaze can burn or peel, and the visual finish can deteriorate quickly if the wrong disc is used.
Another issue is going too deep. If you are grinding down a tile lip, you are reducing the surface of one tile to match another. There is only so much material you can remove before the tile looks patched or weakened. In some cases, replacing the tile is the better result.
Then there is dust. This is where plenty of DIY jobs go sideways. Dry grinding without proper extraction fills the room, settles through the property, and creates a serious silica exposure risk. If the site is occupied, or if you are working in a kitchen, bathroom, office, or retail space, clean containment matters just as much as the grinding itself.
Floor tile versus wall tile
Floor tile grinding is usually about levelling, edge reduction, or surface prep after removal. Wall tile grinding tends to be more delicate, especially in bathrooms and splashbacks where surrounding finishes can be damaged easily. Vertical work also changes tool control and dust fall.
If you are grinding wall tile near waterproofing zones, fittings, or finished joinery, caution is essential. Removing too much material or damaging adjacent areas can create a much bigger repair scope than the original problem.
When you should not grind tile yourself
There are jobs where DIY tile grinding is reasonable, and there are jobs where it becomes false economy. If the area is large, the tile is extra hard, the bedding is stubborn, or the goal is to leave the slab ready for new flooring, specialist equipment and experience make a real difference.
The same goes for renovation sites on a deadline. Builders, property managers, and homeowners often lose time trying to patch-fix a floor that actually needs proper preparation. A rushed grind can leave uneven substrate, residual adhesive, or damage that holds up the next trade.
This is particularly true after tile removal, where what remains is often not just tile fragments but bedding, glue, and inconsistent slab condition. Getting that surface truly ready for retiling, vinyl, timber, epoxy, or another finish is a separate trade task, not just a quick pass with a grinder.
What a professional approach changes
A professional tile grinding setup is about more than a stronger machine. It is the combination of the right abrasives, proper dust control, substrate knowledge, and the discipline to know when grinding is the right method and when full removal is smarter.
That is where specialist operators stand apart. They are not guessing whether the slab can be cleaned up, whether the tile can be reduced cleanly, or whether the area needs stripping back further. They assess the substrate, control the mess, and leave the job ready for the next stage.
For clients in Northern NSW, the Gold Coast, Brisbane, and the Sunshine Coast, that often means less downtime, less disruption, and fewer surprises once the floor covering is off. Rapid Stripped handles this kind of preparation work every day, particularly where speed, cleanliness, and a proper finish matter.
A better result comes from knowing the limit
Learning how to grind tile is really about knowing where grinding helps and where it starts creating new problems. Small corrections, edge reduction, and residue removal can be handled well with the right setup and a steady hand. Larger prep work, hard materials, and occupied-site conditions usually call for a more controlled trade approach.
If the goal is not just to remove material but to leave the area clean, safe, and ready for renovation, the smartest move is often the one that avoids rework.