


Vinyl flooring often looks easy to pull up until the first strip tears, the adhesive stays behind, and the slab underneath is in worse shape than expected. If you are working out how to remove vinyl flooring before a renovation, the real job is not just lifting the surface. It is getting the floor clean, sound and ready for what comes next.
That matters whether you are replacing a few rooms at home, preparing an investment property, or turning over a commercial site on a tight programme. Some vinyl comes up with hand tools and patience. Some fights all the way down to the substrate. Knowing the difference early saves time, damage and a lot of frustration.
Before you remove vinyl flooring, check what is underneath
The first step is identifying the type of vinyl and the surface below it. Sheet vinyl, vinyl tiles and vinyl planks all come off differently. So do floors installed with perimeter glue, full-spread adhesive or peel-and-stick backing.
The substrate makes just as much difference. Concrete can usually handle more aggressive scraping and grinding. Timber needs a lighter touch because gouges, moisture and excess force can create repair work you did not plan for. If the floor is already uneven or has old patching compound, expect the removal to expose more issues rather than fewer.
Age also matters. Older flooring and adhesives can become brittle, which helps in some cases, but they can also break into small sections and stay bonded to the floor. On renovation jobs, it is common to find vinyl laid over previous coverings, underlay, or layers of adhesive residue from earlier installs.
Tools that make the job easier
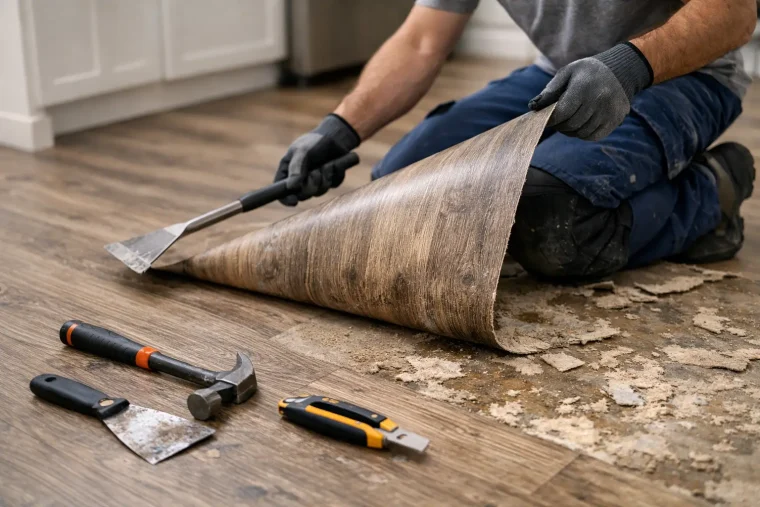
If you want to know how to remove vinyl flooring efficiently, start with the right gear. A utility knife, floor scraper, pry bar, hammer, heavy-duty gloves, safety glasses and knee protection cover most residential jobs. For tougher removals, a long-handled scraper or powered floor stripper can speed things up dramatically.
Dust control and clean-up matter too. Have rubbish bags or a skip ready, along with a broom, vacuum and plastic sheeting if you need to contain debris. If you are working in an occupied home or business, protecting adjacent areas is part of doing the job properly, not an optional extra.
Heat can help soften some adhesives, but it is not a fix for every floor. In some cases it speeds removal. In others it turns glue into a sticky mess that spreads further across the substrate. Test a small area first before committing to one method.
How to remove vinyl flooring step by step
Start by clearing the room completely. Remove appliances, furniture, doors if needed, trims or skirting boards where access is tight, and any transition strips at the doorway. The cleaner the workspace, the faster and safer the removal.
For sheet vinyl, cut the flooring into manageable strips with a utility knife. Do not try to pull up the whole room in one go. Smaller sections give you better control and reduce tearing. Begin at a loose edge, corner or doorway and use a scraper to lift the material while pulling steadily by hand.
For vinyl planks or tiles, find a seam or damaged section and get underneath it with a scraper or pry bar. Once one piece is up, the rest usually follow more easily. Floating vinyl planks are generally straightforward. Fully glued products are not. They often need repeated scraping and more force to separate from the floor.
The key is to work low and flat rather than jabbing downward. Sharp, steep scraping angles are more likely to gouge timber or chip patching compounds on concrete. If the vinyl keeps snapping off in small pieces, slow down and change approach rather than forcing it.
Removing glued vinyl flooring is the hard part
This is where many DIY jobs blow out. Lightly bonded vinyl might peel up in strips, but full-spread glue can hold fast across the entire floor. You are no longer just removing the vinyl. You are removing a bonded system.
If the top layer comes away and leaves backing or felt behind, scrape the residue in sections. Sometimes a heat gun helps release stubborn spots, but too much heat can bake adhesive deeper into porous concrete or damage timber underneath. Adhesive removers are available, but they are not always suitable for every substrate and can create extra clean-up before the new flooring goes down.
On concrete, mechanical removal is often the most reliable path when glue is heavy, aged or spread wall to wall. Scraping may lift the bulk of it, but it rarely leaves the slab ready for direct installation. Residual adhesive, uneven patches and contamination usually need further preparation. That may mean grinding the slab to get it back to a clean, solid finish.
On timber, you need more caution. Heavy scraping, soaking the floor or using the wrong chemical can cause swelling, delamination or visible damage. If the boards are staying in place and being refinished, it is worth slowing down and protecting the surface.
What to do with the adhesive left behind
A lot of people think the floor is done once the vinyl is gone. It is not. Adhesive is often the part that decides whether your next trades can get started or whether the whole project stalls.
Thin adhesive smears may scrape off by hand. Heavier build-up usually needs a combination of scraping and surface preparation. If the slab feels tacky, has ridges, or shows dark patches of old glue, it is not ready for new floor coverings. Many flooring products require a clean, level and contaminant-free substrate to bond correctly.
This is where trade experience counts. Overworking one patch while ignoring the rest of the room can leave an uneven surface. Taking shortcuts on glue removal can also lead to bond failure, telegraphing through new flooring, or moisture issues trapped under the next layer.
When DIY works and when it does not
There are situations where removing vinyl yourself makes sense. A small laundry with loose vinyl and minimal adhesive is manageable for most capable renovators. The same goes for click-lock vinyl planks in a room with clear access and no urgent deadline.
But if the floor is glued hard to concrete, spread across a large area, or part of a live renovation schedule, the job changes quickly. Commercial spaces, kitchens, bathrooms, tenanted properties and multi-room strip-outs usually need more than hand tools and spare weekends. Speed, dust control and substrate preparation become the real issue.
That is also true when the next contractor is booked in straight after removal. Builders and property owners do not just need the old floor gone. They need the site ready. There is a big difference between partial removal and a floor that is properly stripped, cleaned and prepared for reinstallation.
Common mistakes when removing vinyl flooring
The most common mistake is underestimating the adhesive. The second is damaging the substrate in the rush to get through it. Both create delays.
Another mistake is skipping edge details. Doorways, cabinetry kickboards, toilets, vanities and thresholds often hold the most stubborn sections. If these areas are left rough or contaminated, they can interfere with new flooring and trim work later.
Poor clean-up is another problem. Fine debris, glue fragments and lifted underlay can spread through the site quickly. On occupied homes and businesses, that means more disruption than necessary. On renovation sites, it means more work for every trade that follows.
How professionals remove vinyl flooring faster
Professional removal teams approach vinyl with the end result in mind. That means assessing the flooring type, the bond strength, the substrate condition and the finish required after removal. It is not just about brute force. It is about choosing the fastest method that still leaves the floor in proper condition.
On straightforward jobs, that may be controlled lift-up and scrape removal. On difficult floors, it can mean powered stripping equipment, slab grinding and tighter dust management so the site stays safer and cleaner throughout the process. That level of planning is why specialist teams can often complete work in a day that would otherwise drag on much longer.
For homeowners and renovators across Northern NSW, the Gold Coast, Brisbane and the Sunshine Coast, that speed matters when kitchens, bathrooms, offices or retail spaces need to move to the next stage without delay.
If you are deciding how to remove vinyl flooring, be honest about what you need at the end of the job. If it is just lifted, that is one task. If it needs to be renovation-ready, that is a different standard altogether.
The smartest move is the one that gets the old floor out without creating a bigger problem underneath.