
If you have started lifting a tiled floor and found the first tile comes up easily while the next ten refuse to move, you already know the truth – learning how to remove floor tiles is not just about swinging a hammer. The real job is controlling damage, managing dust, and leaving the slab or subfloor ready for whatever comes next.
That matters whether you are renovating a bathroom, updating a kitchen, preparing an investment property, or stripping out a commercial site on a tight program. Tile removal looks straightforward from a distance. Up close, it can turn into cracked substrates, stubborn bedding, hidden waterproofing issues, and adhesive residue that holds up the next trade.
How to remove floor tiles without making a mess of the subfloor
The first step is working out what sits underneath the tile. Ceramic and porcelain tiles over a concrete slab behave very differently from tiles fixed over compressed sheeting, cement board, or older timber floors. Some will release in sheets once you break the bond. Others will shatter into sharp fragments while the bedding stays put.
Before any removal starts, clear the room properly. Furniture, appliances, loose fittings, doors if necessary, and anything likely to catch dust should be removed or protected. Power and water isolation may also be needed in wet areas or commercial spaces. If the tiled area meets carpet, timber, vinyl, or another finished surface, protect those edges early. It is easier to prevent damage than repair it later.
You also need the right safety gear. At a minimum, that means eye protection, gloves, hearing protection, long sleeves, long pants, and a proper dust mask or respirator. Broken tile edges are razor sharp, and once mechanical removal begins, debris travels fast.
Start with the easiest break point
If you want to know how to remove floor tiles efficiently, start where the floor gives you an advantage. A loose tile, a cracked corner, a doorway transition, a floor waste cut-out, or the perimeter near skirting can provide the opening you need. Trying to attack the strongest part of the floor first usually wastes time.
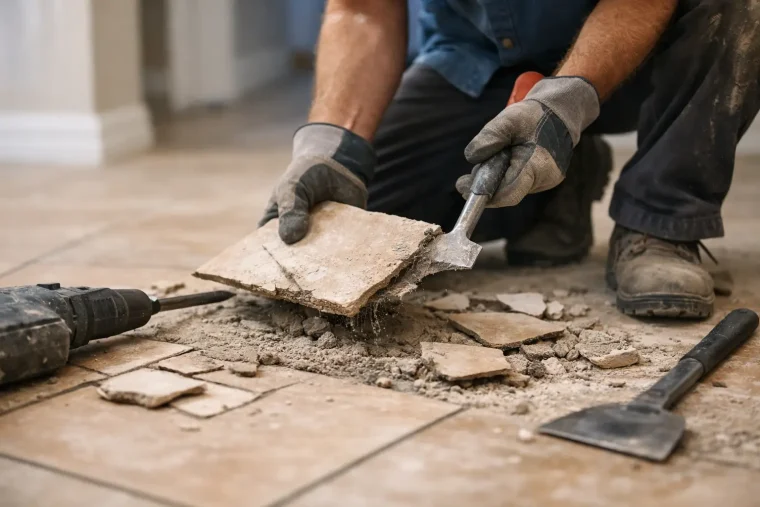
For small areas, a hammer and cold chisel may be enough to get under the first tile. Angle the chisel beneath the tile rather than straight down into the substrate. The goal is to break the tile free, not gouge the surface underneath. Once one or two tiles are out, you can often work under the adjacent ones and build momentum.
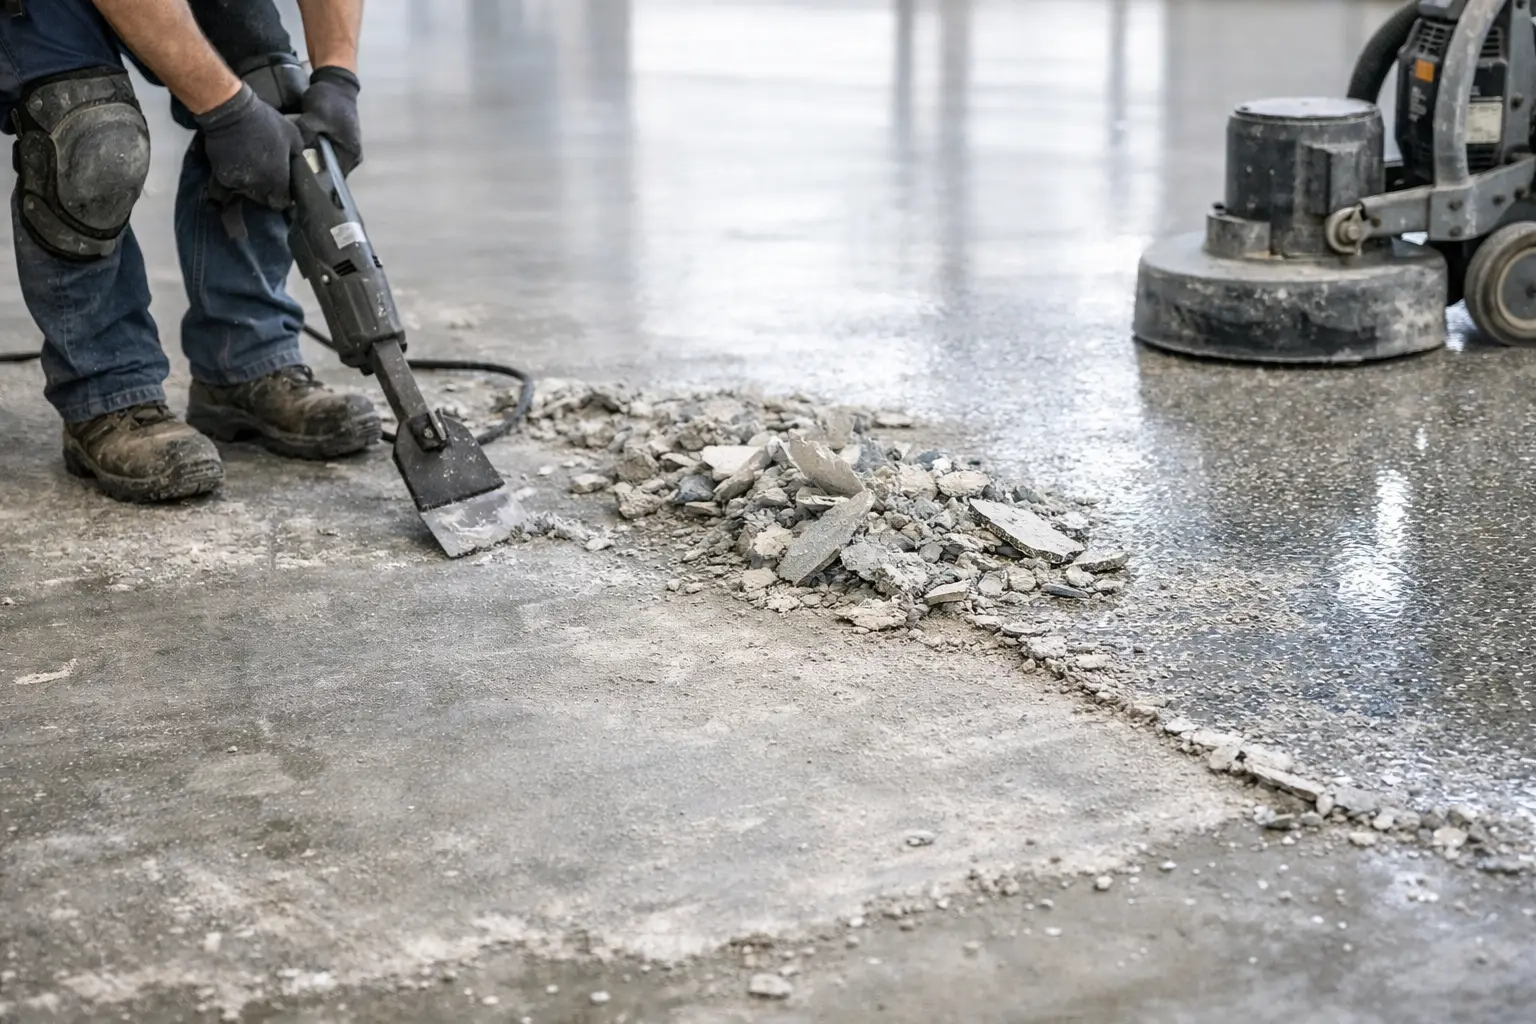
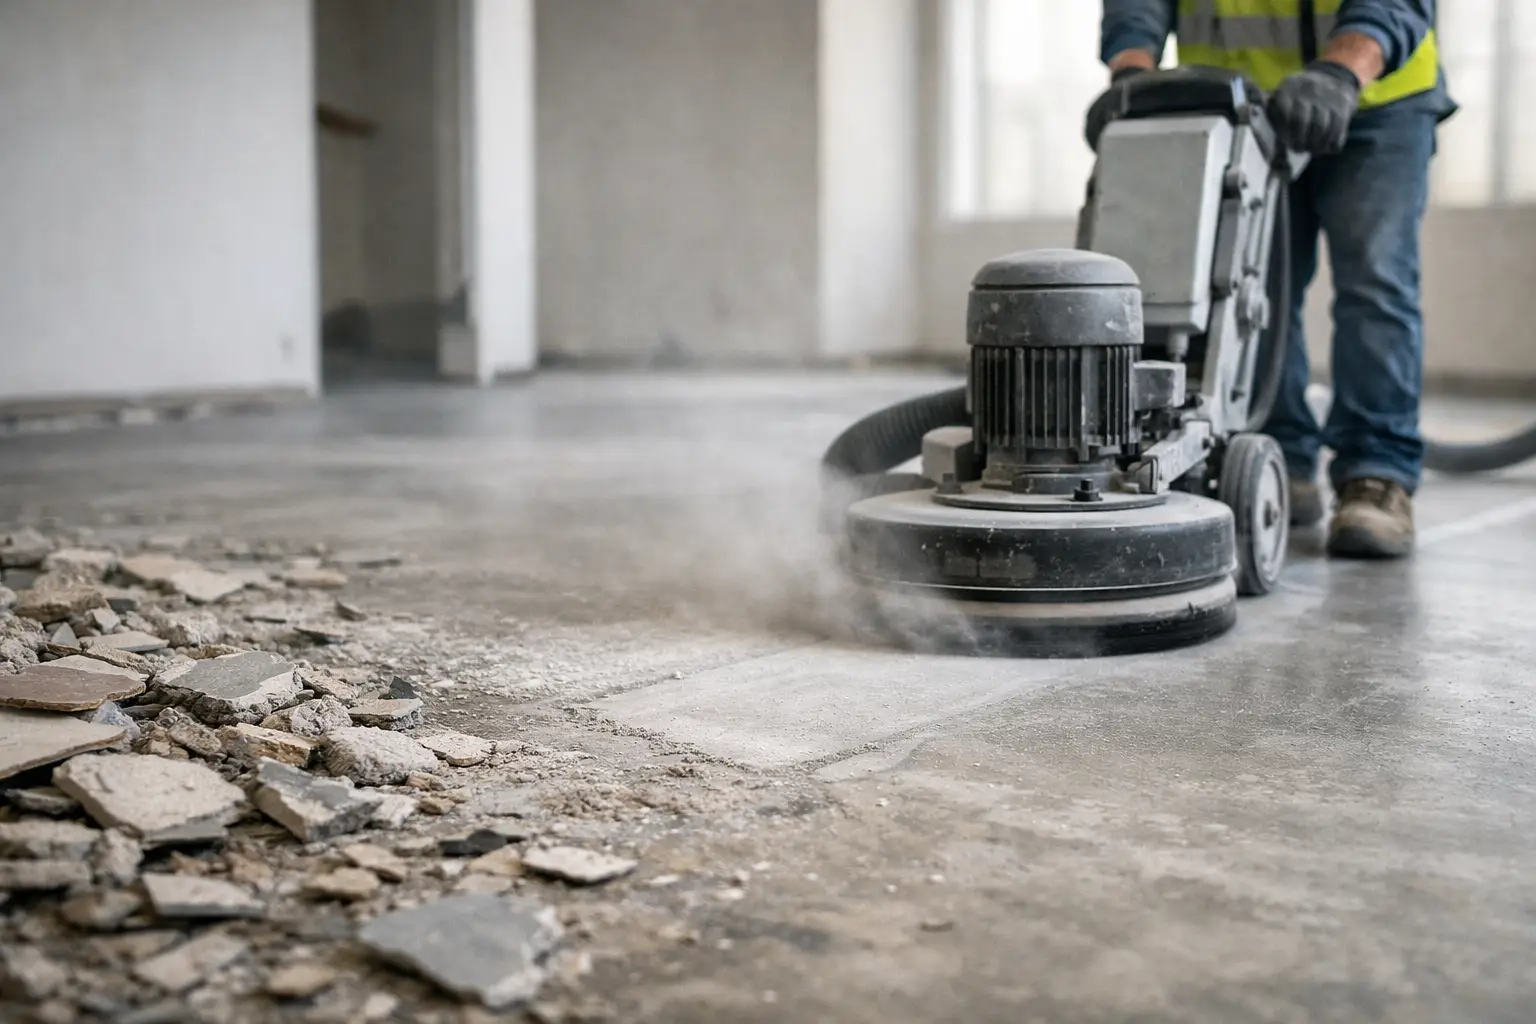
On larger jobs, a demolition hammer with a wide tile chisel speeds things up significantly. This is where experience matters. Too steep an angle and you dig into the slab. Too shallow and you bounce off the surface without achieving much. A controlled, consistent approach gets cleaner removal and less remedial work after.
Concrete slab versus timber subfloor
Concrete gives you more tolerance during removal, but it is not indestructible. Poor technique can leave low spots, chips, and scarring that need grinding or patching before new flooring goes down. If the old tile bed is thick or heavily bonded, removal may involve not only the tile itself but also the mortar beneath it.
Timber and sheeted floors need more care. Aggressive mechanical removal can crack sheets, loosen fixings, or damage the structure below. In some cases, the smarter move is to remove tiles and underlay together if the whole assembly is due for replacement. It depends on the renovation plan and the condition of the existing floor.
The tile is only half the job
A lot of people think the job is done once the visible tiles are gone. It rarely is. The bedding, thin-set, adhesive, or levelling compound underneath often takes as much effort as the tile removal itself.
If you are replacing tiles, installing hybrid flooring, laying vinyl, or polishing concrete, the surface needs to be flat, sound, and clean. Leftover adhesive ridges or mortar high points can cause failures in the new finish. This is why proper floor stripping is not just demolition – it is surface preparation.
In practical terms, that may mean scraping residual adhesive, mechanically removing bedding, grinding the slab, and checking for cracks, moisture issues, or previous patch repairs. On older floors, you may also uncover multiple layers from past renovations. That is common in units, kitchens, shops, and high-traffic commercial premises.
Dust, noise, and disruption are real factors
Anyone asking how to remove floor tiles should also ask how much disruption the job will create. Tile removal is noisy. It is dusty. It generates a surprising amount of rubble in a short time. In occupied homes and operating businesses, that affects everything from access and cleaning through to neighbouring rooms and adjoining tenancies.
For that reason, dust control is not an optional extra. Sealing off work areas, using appropriate extraction, and staging rubbish removal as you go makes a major difference. Clean execution keeps the site safer and helps the next stage of the renovation start on time.
This is one of the biggest differences between a quick rip-up and a professional strip-out. Anyone can break tiles. The harder part is doing it efficiently, safely, and without leaving a bigger problem behind.
When DIY works and when it does not
For a very small area with loose tiles and easy access, DIY tile removal can be manageable. A laundry nook or a simple entry may not justify heavy machinery or a full removal crew if you have time, patience, and the right gear.
But there are clear points where DIY becomes expensive in other ways. Large tiled areas, bonded screeds, commercial sites, upstairs units, wet areas with membranes, and jobs with strict timelines usually need a specialist approach. The same goes for floors with difficult adhesives, uneven substrates, or a requirement to leave the slab ready for immediate reinstallation.
The trade-off is simple. You can save on labour by doing it yourself, but you may lose time, create more clean-up, and end up needing repairs to the substrate. If your builder, tiler, or floor layer arrives to a rough or contaminated surface, delays follow quickly.
Common problems that slow tile removal down
Not every floor comes up the same way, even in the same building. Some tile beds are brittle and release cleanly. Others are rock hard and fused to the slab. That is why experienced operators assess the floor before deciding on tools and removal method.
One common issue is tile over tile, where a newer floor has been installed over the old one. Another is waterproofed wet areas, where removal can expose damage or require the membrane to be removed and reinstated as part of the renovation. Some floors also hide old adhesives, levelling compounds, or surface contamination that only becomes obvious once the top layer is gone.
Commercial sites add another layer again. Access hours, noise restrictions, rubbish handling, lift protection, and staged work areas all affect how the removal needs to be carried out. In those environments, speed matters, but control matters more.
How to remove floor tiles and leave the site renovation-ready
The best tile removal jobs are judged by what happens after the tiles are gone. Can the next trade walk in and get moving, or do they inherit extra prep work, debris, and avoidable delays?
A renovation-ready result means the waste has been removed, the surface has been stripped back properly, and any remaining high spots, adhesive, or bedding have been dealt with. It also means transitions, edges, and adjoining areas have been handled cleanly so the replacement flooring can be set out properly.
For homeowners and property managers, this is where specialist removal earns its keep. A team that handles difficult coverings every day knows how to move fast without compromising the slab or subfloor. That is particularly valuable on bathrooms, kitchens, full-home renovations, office refits, and tenanted properties where downtime affects everything else.
In regions like Northern NSW, the Gold Coast, Brisbane, and the Sunshine Coast, fast-turnaround removal is often the difference between a project staying on track or dragging out while other trades wait. Rapid Stripped focuses on exactly that kind of work – clean, efficient floor removal with the site left ready for the next stage.
Final word on getting it done right
If you are working out how to remove floor tiles, think beyond the first broken tile. The job is not just removal. It is preparation, control, and leaving a clean base for what comes next. When that part is done properly, the whole renovation runs better.